NovaStar VX4, developed by NovaStar Technology, is a professional LED display controller that goes beyond basic display control by incorporating powerful front-end processing, eliminating the need for an external scaler. With integrated professional interfaces, it delivers outstanding image quality and flexible image control, perfectly meeting the demands of the broadcast industry. Its user-friendly interface ensures that operating the display has never been easier or more enjoyable.
1. VX4 Novastar Appearance
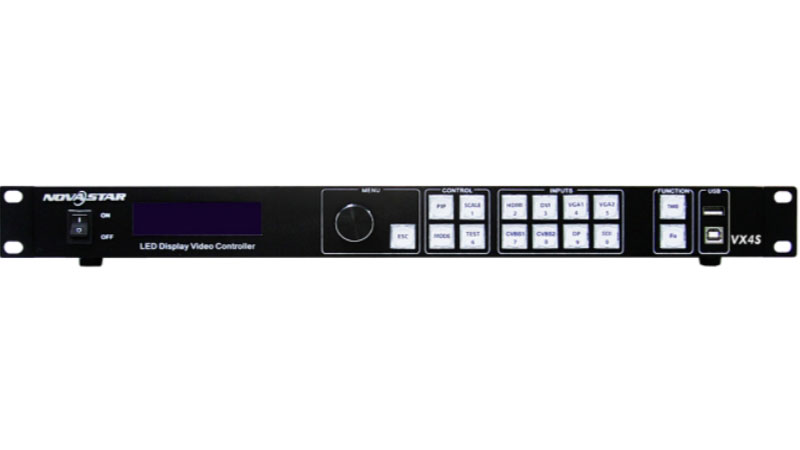
1.1 Front Panel
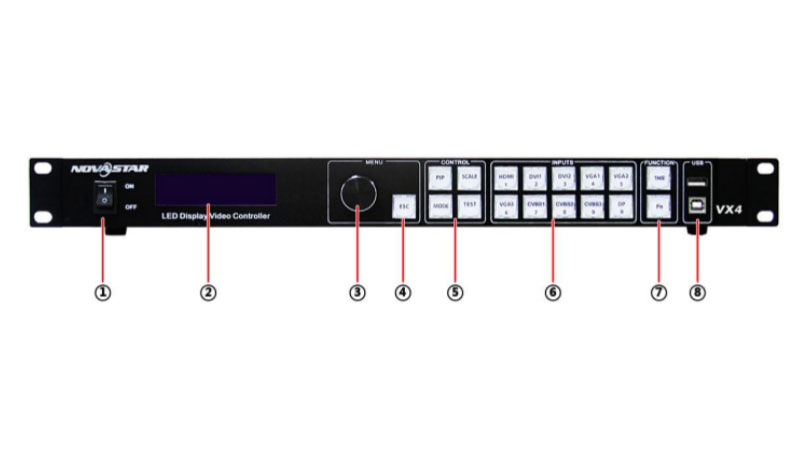
| No. | Description |
| ① | Power switch. |
| ② | Operation screen. |
| ③ | Knob. To press knob means Enter or OK, rotating knob represents selection or adjustment. |
| ④ | ESC. Escape current operation or selection. |
| ⑤ | Four control keyboard shortcuts. PIP: PIP Turn-on/off. SCALE: Picture zoom turn-on/turn off. MODE: Shortcut menu of loading or storage of display model. TEST: Shortcut of turn-on/off of testing picture. |
| ⑥ | Shortcut keys for switching of 8 signal input source. |
| ⑦ | TAKE: Display switching shortcut key. After short pressing TAKE key, PIP will be opened; if it has been opened, the switching of between MAIN and PIP will be realized. Fn: Custom shortcut key. |
| ⑧ | Flat mouth (Type A, female USB) is USB interface, which connects U disk; Square mouth (Type B female USB) is USB controlling interface, Communication with PC. |
1.2 Rear Panel
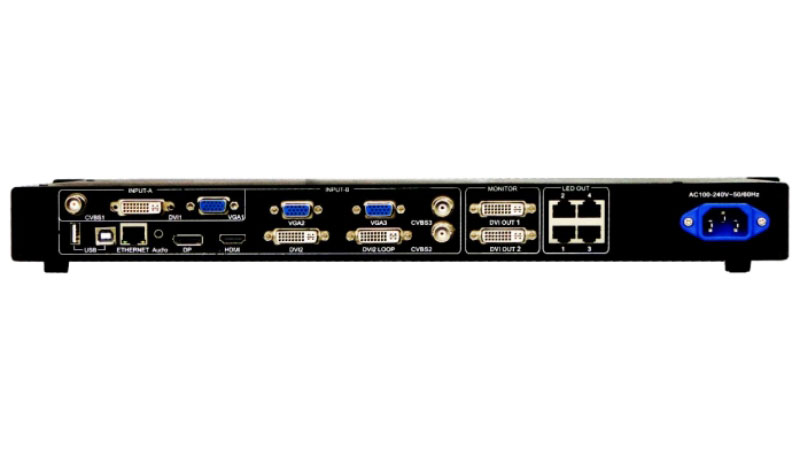
Input Source: Audio, DP, HDMI, CVBS1~CVBS3, DVI-1~DVI-2, VGA1~VGA3
Output Interface: DVI LOOP, Monitor-DVI OUT 1, Monitor-DVI OUT 2, LED Out 1、2、3、4 (4 Gigabit Ethernet outputs.), ETHERNET, Type B (female USB), Type A (female USB)
Power: AC 100-240V~50/60Hz
1.3 Main Interface
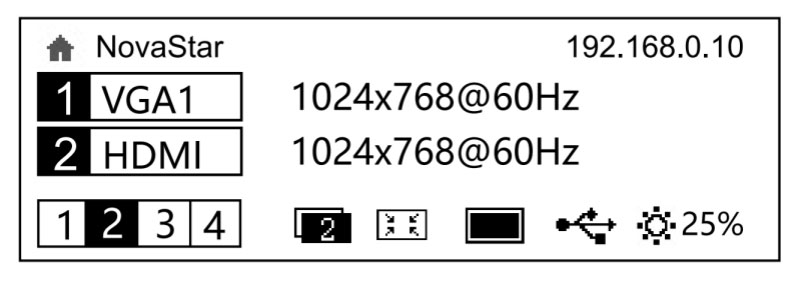
First Row: Company name; the name and IP of the product are shown alternately;
Second Row: Main screen 1; signal source; input source signal format;
Third Row: PIP 2; signal source; input source signal format;
Forth Row: Status bar.
2. NovaStar VX4 Price
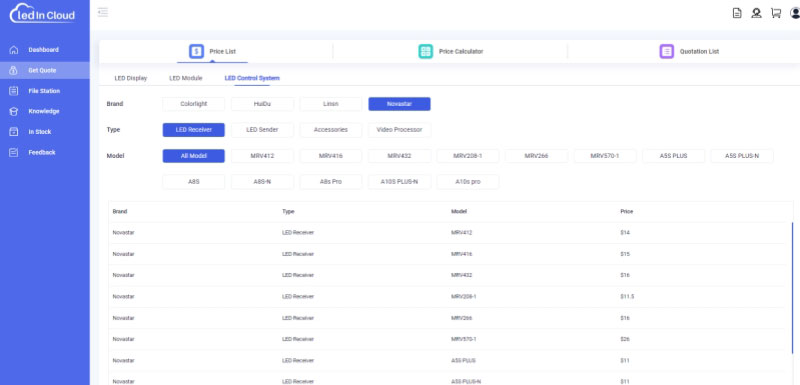
For the most accurate and up-to-date pricing, we recommend registering on our LED Screen Cloud Platform. By signing up, you’ll gain access to detailed pricing information for all NovaStar models, including the NovaStar VX4. Additionally, you can consult with our professional team to find the best solution tailored to your specific requirements.
3. Features
Versatile Input Options: Nova VX4 supports a wide range of inputs, including CVBS×3, VGA×3, DVI×2, HDMI×1, and DP×1. These inputs accommodate resolutions up to 1920×1200@60Hz, allowing for high-quality content display.
Advanced Image Scaling: With the ability to zoom input images point-to-point according to the screen resolution.
Seamless Switching and Effects: The controller offers seamless, high-speed switching and fade-in/fade-out effects, enhancing the quality of picture transitions.
Flexible Picture-in-Picture (PIP): The VX4 allows for the adjustment of both the location and size of the PIP, providing users with full control over their display layout.
Nova G4 Engine: The VX4 adopts the Nova G4 engine, delivering a stable, flicker-free screen without scanning lines. The images are sharp and have a notable sense of depth, providing an immersive visual experience.
True Color Reproduction: The controller can implement white balance calibration and color gamut mapping based on the specific characteristics of the LEDs used in the display.
High-Quality Audio Support: It includes HDMI and external audio inputs, supporting both 10bit and 8bit HD video sources.
High Loading Capacity: The VX4 has a loading capacity of 2.3 million pixels and supports the montage of multiple controllers to manage large LED screens.
Efficient Correction Technology: The controller supports Nova’s new-generation point-by-point correction technology, enabling quick and efficient calibration of the display.
Smart Configuration: Featuring an innovative architecture, the VX4 enables smart configuration, allowing screen debugging to be completed within 30 seconds, significantly reducing preparation time for events.
Touch Track System: System configuration is made simple with the Touch Track system, where all settings can be adjusted using just one knob and one button, eliminating the need for computer software.
Intuitive Control Interface: The VX4 is equipped with an intuitive LCD display and clear button light hints, making system control straightforward and user-friendly.
4. Specifications
| Electrical specifications | Power connector | AC100-240VAC 50/60Hz |
| Power consumption | 25W | |
| Operating environment | Operating temperature | -20℃ to 70℃ |
| Operating Humidity | 20%RH to 90%RH | |
| Storage Humidity | 10%RH to 95%RH | |
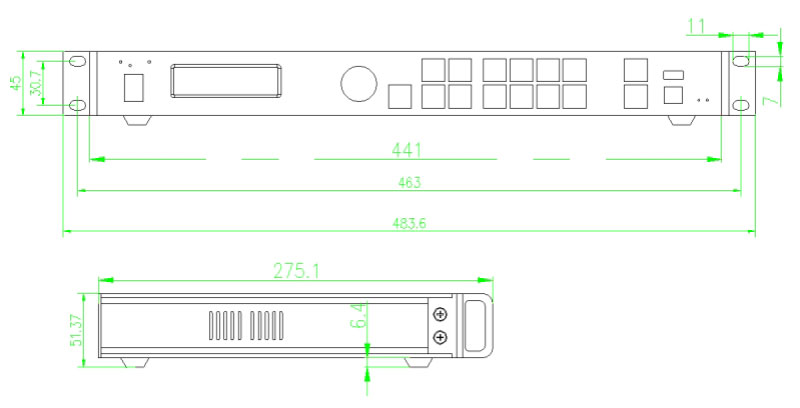
| Physical specifications | Dimensions | 482.6mm ×275mm ×45mm |
| Package dimensions | 2.55 kg | |
| Net weight | 5.6 kg | |
| Packing information | Carrying case | 530mm ×140mm ×370mm |
| Accessory box | 402mm ×347mm ×65mm Accessories: 1 ×power cord, 1 ×Ethernet cable, 1 ×DVI cable, 1 ×HDMI cable, 1 ×DP cable, 1 ×VGA cable and 1 ×PH2.0 Double terminal line | |
| Packing box | 550mm ×400mm ×175mm |
5. Operation Instructions
5.1 Input Settings
For digital input interfaces like DVI, HDMI, and DP, you can directly set and change the resolution. For other input methods, resolution changes must be made on the input devices. There are two ways to set input resolution:
Method One: Preset Resolution
Choose from the controller’s preset resolutions. If the desired resolution isn’t available, proceed to customize it.

Method Two: Custom Resolution
Manually set the Horizontal and Vertical resolution along with the refresh rate. Afterward, select “Apply” and press the knob to confirm.

5.2 Screen Settings
For shortcut screen settings, the screen and cabinets must be regular rectangles with identical sizes.
Step 1: Ensure the screen is powered on. If the cabinets display normally, proceed to Step 2. If not, load the cabinet file and save it to the receiving card. Refer to Advanced Settings for details.
Step 2: Go back to the “Screen Settings” submenu. Rotate the button to navigate through the submenus and configure the settings.

Step 3: Adjust the Cabinet Row Qty and Cabinet Column Qty based on the screen’s actual layout.
Step 4: Set the Port1 Cabinet Qty, keeping in mind the device’s limitations on the number of cabinets per port.
Step 5: Define the Data Flow (Front View).
5.3 Brightness Settings
Go back to the main menu. Press the Knob to choose the Brightness Setting. Then, rotate the knob to adjust the brightness value.

5.4 Output Settings
Output settings are divided into three cases:
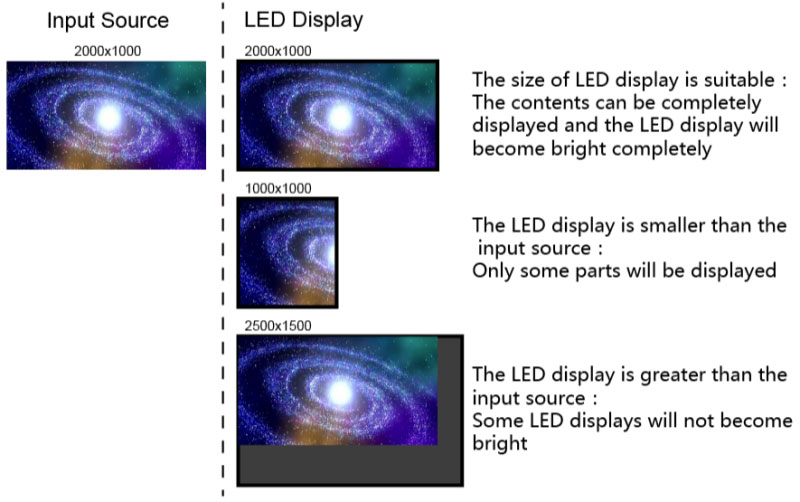
Disable Scaling: The output image matches the input image size, preserving the original scale. If the input resolution is smaller than the LED display in any direction, that part may remain unlit. If larger, some content may be cut off. This setting is ideal for point-to-point display scenarios. You can adjust the horizontal and vertical offsets to reposition the content on the screen.
Auto Fit: When [Scaling] is turned on, [Auto Fit] automatically adjusts the input content to fully cover the LED display, making it ideal for full-screen content playback.
Custom Scaling: In this mode, [Scaling] is active, but [Auto Fit] is disabled, allowing for manual scaling adjustments.
For custom scaling, follow these steps:
Step 1: Adjust the input capture by selecting a portion of the input image to display on the LED screen, starting from a specific point. Set the Horizontal and Vertical Resolution (which should not exceed the input source’s resolution) along with Horizontal X and Vertical Y coordinates.

Step 2: Configure the Output Window, ensuring its size is within or equal to the LED display dimensions. The content will fit within this window, which is useful for scenarios requiring a border or restricted playback area on the LED display.

Once you’ve completed the two steps above, the captured content will be displayed solely within the specified area on the LED screen, as illustrated below:

Learn more form this video:
6. NovaStar VX4 Manual& Specifications& Software Download
We recommend visiting our NovaStar Software and NovaStar RCFG File Download page, where you can freely download everything you need. This centralized hub provides easy access to all relevant documentation and software, guaranteeing you have the tools required for a seamless experience with NovaStar products.
7. Nova VX4 FAQS
What input resolutions does the NovaStar VX4 support?
The NovaStar VX4 supports a wide range of input resolutions, including common formats like 1920×1080, 1280×720, and more.
Can I control the VX4 remotely?
Yes, the NovaStar VX4 can be controlled remotely via various interfaces, including USB and Ethernet.
Where can I find detailed specifications for the VX4?
Detailed specifications for the NovaStar VX4, including input/output configurations and control interfaces, can be found in the user manual. You can download the manual and other related documents from our NovaStar Resources Download section.
What should I do if my VX4 isn't displaying content correctly?
If your VX4 isn’t displaying content properly, first check the input and output resolutions to ensure they are set correctly. Additionally, verify the cable connections and consult the user manual for troubleshooting tips. If the issue persists, consider reloading the cabinet files or resetting the device.

