a. Adding Cabinets
Step 1: Select the device type and Ethernet port type.
Step 2: Under the Edit ab, you can add cabinets using any of the methods below:
Method 1: Click Batch Add, input the details for the new cabinets, and confirm by clicking OK. Position the cursor over the canvas and click to place the cabinets.
Method 2: Choose a specific cabinet icon, and navigate to the canvas. Click and hold the left mouse button to position the cabinet. To cease adding cabinets, right-click.
b. Cabinet Configuration
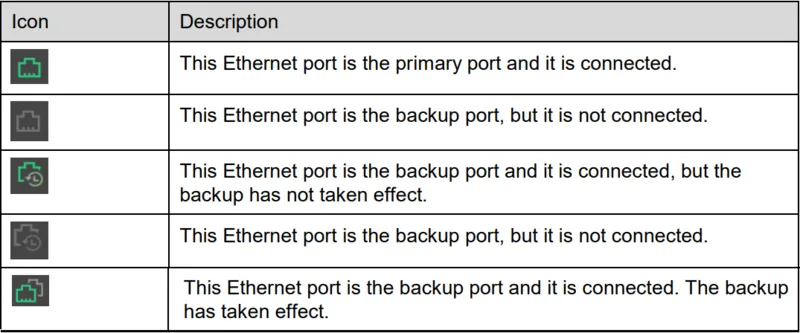
Connecting Cabinets: Ensure cabinets are connected before initiating screen configuration by following one of these methods:
Method 1: Automatic Connection
- On the “Create a new project” interface, once you’ve determined the cabinet arrangement, opt for “Auto Connect” and select the preferred connection style.
- Cabinets that surpass the single Ethernet port’s capacity limit cannot be linked.
Method 2: Manual Connection
- Place cabinets on the canvas and highlight the ones you wish to connect. In the “Cabinet Connection” menu of the toolbar, select a connection style. Connections will halt if the cumulative load of the cabinets exceeds the Ethernet port’s maximum capacity.
- Position cabinets on the canvas. Click to pinpoint the center of the desired cabinet and drag the cursor to the center of the subsequent cabinet, continuing this process.
Methods 3: Keyboard Shortcut Connection
- With the mouse, select the initial cabinet. Concurrently press Shift and the directional arrow keys (Up/Down/Left/Right) to choose and link cabinets.
- This method is compatible solely with standard cabinets.
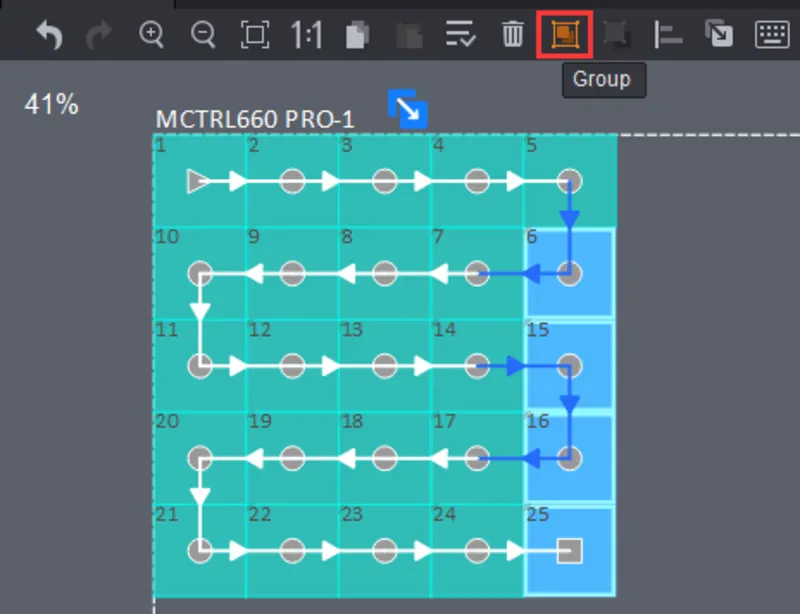
Grouping Cabinets:
Step 1: In the canvas, select the target cabinets and click ![]() (or right-click to choose Group).
(or right-click to choose Group).
Step 2: With the cabinets grouped, access the “Properties” section to assign a group name, color, and the position of the grouped cabinet.
The grouped cabinets will be edited as a whole.
Disconnecting Cabinets: Select the target cabinets and click ![]() in the toolbar, or right-click to choose Delete Connection.
in the toolbar, or right-click to choose Delete Connection.
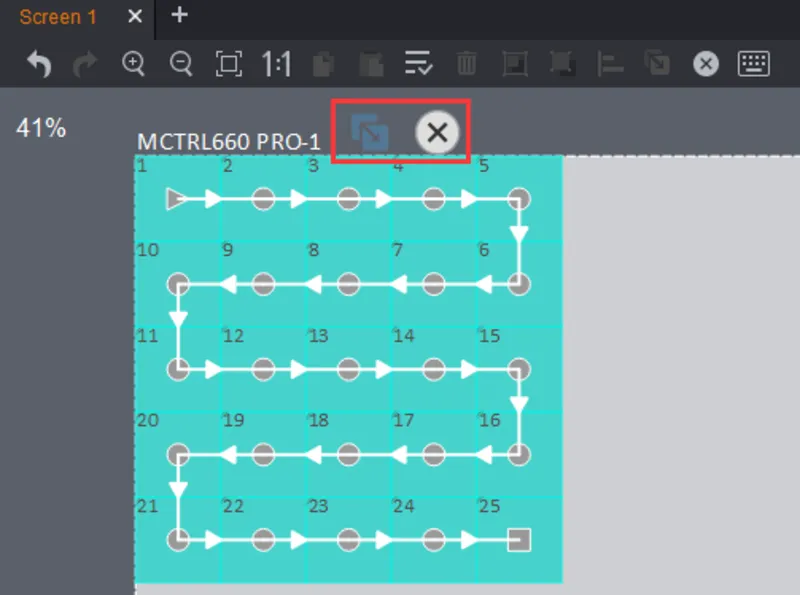
c. Setting Cabinet Offset
After adding and connecting cabinets, a dotted rectangle will frame the cabinets, indicating the connected device’s loading capacity.
Step 1: Click ![]() and drag a cabinet to change its position relative to the dotted rectangle.
and drag a cabinet to change its position relative to the dotted rectangle.
Step 2: Click ![]() to quit the edit.
to quit the edit.
d. Rotating Cabinets
If the added device is equipped with a rotation feature, follow these steps to rotate the cabinets, using MCTRL R5 as an example:
Step 1: Click ![]() and rotate the rotation bar to rotate the cabinets to the desired orientation (or enter a specific rotation angle).
and rotate the rotation bar to rotate the cabinets to the desired orientation (or enter a specific rotation angle).
Step 2: Click to quit the edit.
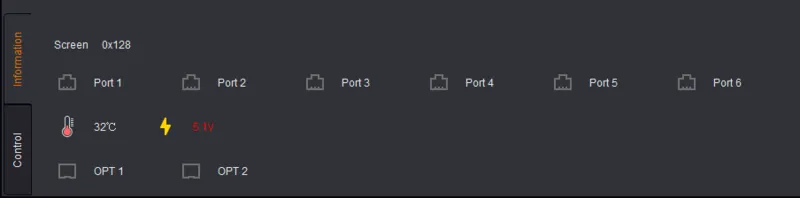
a. Backup Within Device
Step 1: Select a device from the device area, drag it onto the canvas, and click to place the device.
Step 2: Click ![]() at the top right of the device. The Ethernet ports will automatically be backed up. This backup configuration cannot be modified.
at the top right of the device. The Ethernet ports will automatically be backed up. This backup configuration cannot be modified.
Step 3: (Optional) Click to choose the backup Ethernet port and drag it to the desired Ethernet port to set up a backup between Ethernet ports.
Note:
- To remove the backup of Ethernet ports, click
 at the top right of the device.
 - To delete a backup between two Ethernet ports, click
 between two Ethernet ports to delete the backup. Click
  at the top right of the device to delete the device.
b. Backup Between Devices
Hot backup between devices is only available for the devices with the same communication ports.
Step 1: Choose a device from the device area, drag it to the canvas, and click to place the device.
Step 2: Drag another device to the target device. The backup between the two devices will be established automatically.
Step 3: (Optional) Click to select the backup Ethernet port and drag it to the target Ethernet port to perform Ethernet port backup between devices.
Note:
- Once the backup is configured, the
 icon will appear on the line connecting the two devices. Click this icon to switch between master and slave.
 - To delete a device, click at the top right of the device.
- To remove the backup, Click
 at the top right of the dashed box.
 - The slave device is not eligible for screen configuration tasks.
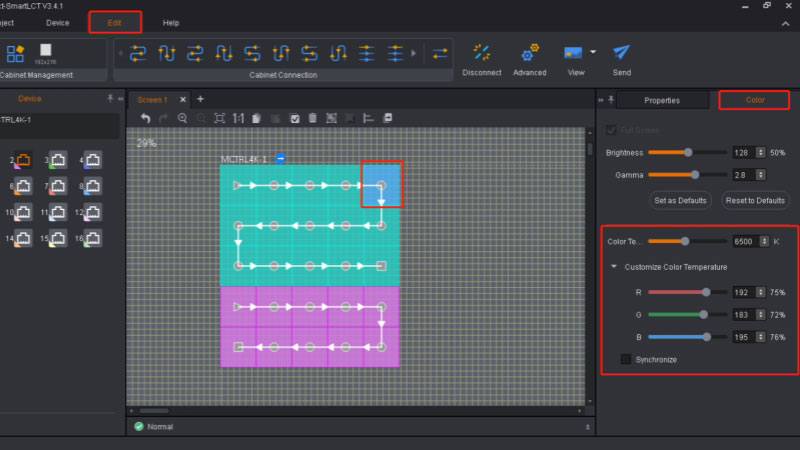
Step 1: Navigate to the Device tab and click ![]() to access the seam brightness adjustment interface.
to access the seam brightness adjustment interface.
Step 2: Select the target seam, and the seam will turn blue.
Step 3: (Optional) Choose the desired precision level for the adjustment.
Step 4: Adjust the seam brightness by dragging the slider located next to the Selected Area Parameter Adjustment, and the borders will turn green.
Step 5: Type “admin” to access the factory area and user area settings page.
- Save to Factory Area: Store the seam brightness adjustment settings in the receiving card’s factory area. These settings are retained for maintenance purposes once the cabinet returns to the factory.
- Save to User Area: Store the seam brightness adjustment settings in the receiving card’s user area. These settings are applied for on-site screen adjustments.
- Load Factory Area: Restore seam brightness adjustment parameters to the parameters last saved in the factory area.
- Load User Area: Restore seam brightness adjustment parameters to the parameters last saved in the user area.
Step 6: Save seam brightness adjustment parameters to the sending device.
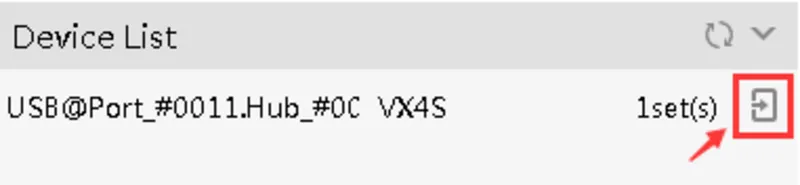
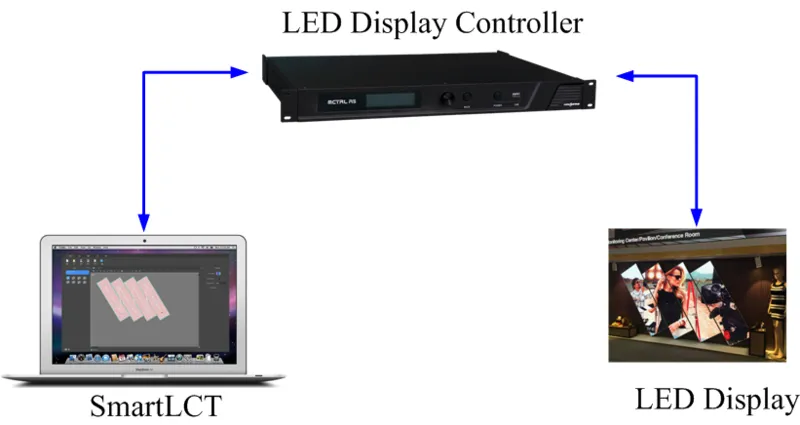
Method 2: In the Device section of the editing page, click ![]() to open V-Sender, as shown in the figure below.
to open V-Sender, as shown in the figure below.
b. Adding Devices
Step 1: At the bottom of the device list, click ![]() to open the Add Devices page.
to open the Add Devices page.
Step 2: Select the devices you want to add and click OK.