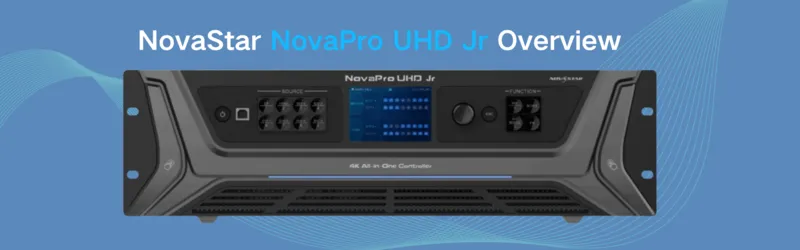
The NovaStar NovaPro UHD Jr is a comprehensive solution for LED screen control, offering a seamless blend of video processing, sending card capabilities, and screen configuration in one device.
With support for ultra-high-definition 4K x 2K@60Hz input, it ensures your content is displayed with the highest fidelity. The unit boasts extensive connectivity options, including 16 Neutrik Ethernet ports and 4 optical fiber outputs, accommodating a substantial pixel load of up to 10.4 million. This makes the NovaPro UHD Jr a top-tier controller for managing the visuals of your stage LED screens with precision and ease.
Kind Everything about NovaPro UHD Jr:
1. NovaStar Novapro UHD Jr Specifications & Appearance
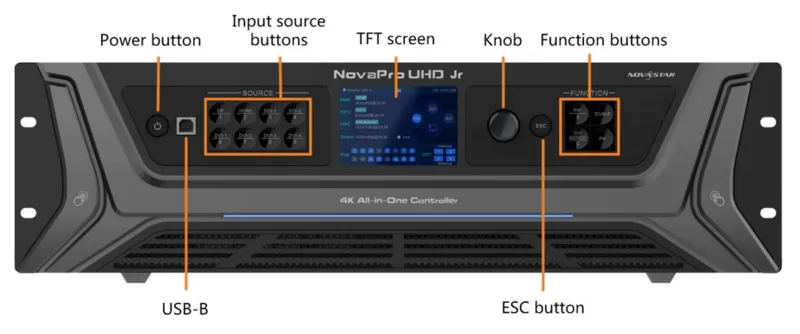
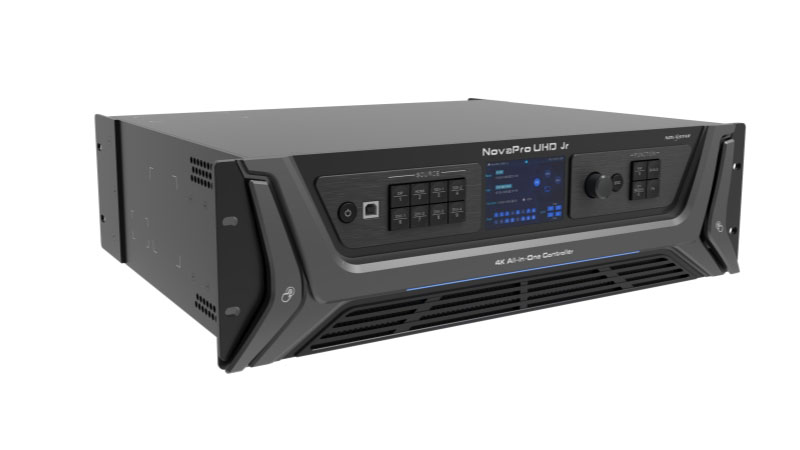
1.1 Front Panel
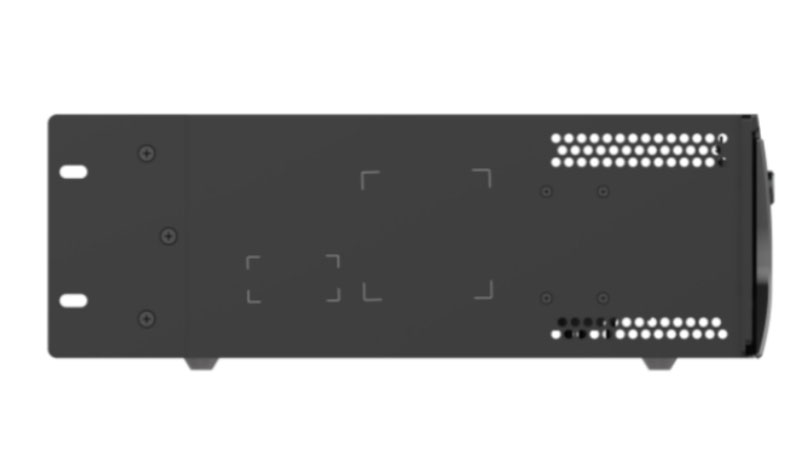
1.2 Rear Panel
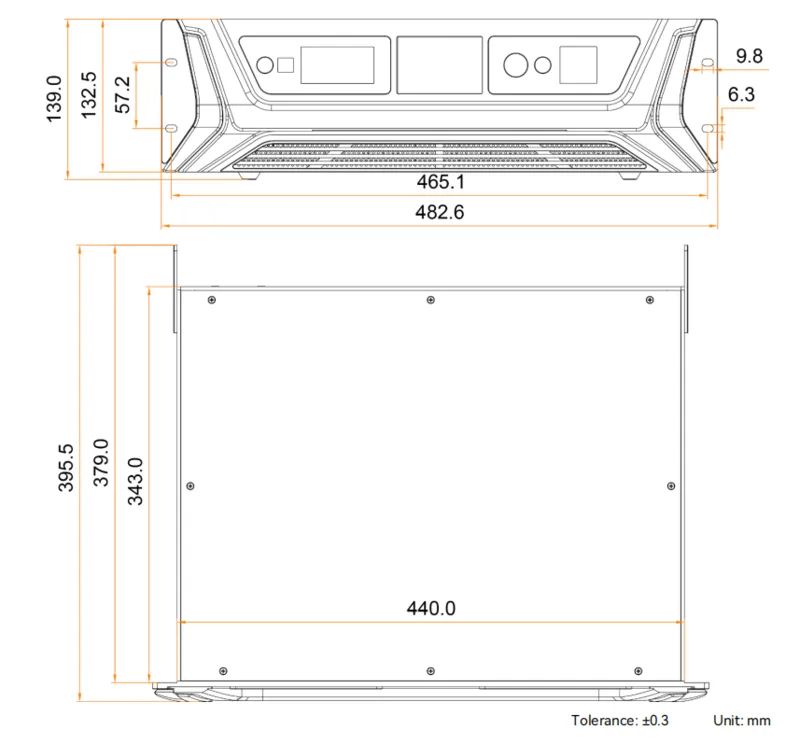
2. NovaStar Novapro UHD Jr Dimensions & Physical Specifications
4. NovaStar Novapro UHD Jr Software & Resource Download
5. NovaStar Novapro UHD Jr Manual
5.1 Screen Brightness
5.2 Layer Settings
5.3 Setting Input Source
5.4 Resolution
5.5 Preset Settings
5.6 Display Control
5.7 Image Mosaic Settings
1. NovaStar Novapro UHD Jr Specifications & Appearance
1.1 Front Panel of Novapro UHD Jr
| Button | Description |
| Power button |
|
| USB-B |
|
| Input source buttons |
White, always on: The input source is inactive and not receiving any signal. Blue, fast flashing: The input source is active but not receiving a signal. Blue, slow flashing: The input source is inactive but receiving a signal. Blue, always on: The input source is active and receiving a signal. Note: You cannot use the OPT Mosaic and DVI Mosaic sources as the layer input at the same time. |
| TFT screen |
|
| Knob |
|
| ESC button |
|
| Function buttons |
|
1.2 Rear Panel of Novapro UHD Jr
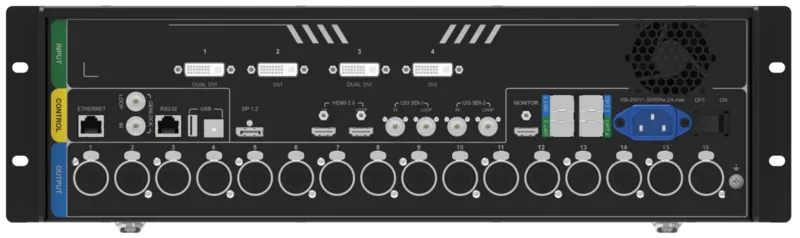
| Input Connectors | Color Depth | Max. Input Resolution | Description |
| 4 x DVI | 8-bit | RGB 4:4:4 |
− 4x DVI inputs. − Each DVI: S-DVI Input resolution up to 2048×1152@60Hz. D-DVI Max. Input Resolution is 3840×1080@60Hz. − 4 DVI input sources constitute 1 input source (DVI MOSAIC). − Max. width: 3840 pixels. Max. height: 3840 pixels.
− DVI 1 and DVI 3 are dual-link DVI connectors while DVI 2 and DVI 4 are unavailable. − DVI 1/DVI 3: Input resolution up to 3840×1080@60Hz, downward compatible. − 2 DVI input sources constitute 1 input source (DVI MOSAIC). − Max. width: 3840 pixels. Max. height: 3840 pixels.
|
| 2 x 12G-SDI |
|
| |
| 1 x DP 1.2 | 8-bit:
| 3840×2160@60Hz |
|
| 10-bit:
| 3840×2160@60Hz | ||
| 12-bit:
| 3840×2160@60Hz | ||
| 1 x HDMI 2.0 | 8-bit:
| 3840×2160@60Hz |
|
| 10-bit:
| 3840×2160@60Hz | ||
| 12-bit:
| 3840×2160@60Hz | ||
| Output Connectors | Description |
| 16 x Ethernet port |
Max. width: 16384 pixels, max. height: 8192 pixels
8-bit input source: 650,000 pixels. 10-bit/12-bit input source: 320,000 pixels. |
| 4 x OPT 1-4 | The OPT function varies depending on the device’s working mode.
OPT 1 and OPT 2 are for input. OPT 3 and OPT 4 are for output and offer two OPT modes: Hot Backup and Copy.
OPT 1, 2, 3, and 4 are for input, and the Ethernet ports are for output. OPT 1 and OPT 2 serve as primary input ports. OPT 3 and OPT 4 serve as backup input ports. |
| 1 x HDMI 2.0 LOOP |
Only 1 level of device cascading supported
|
| 2 x 12G-SDI LOOP |
|
| 1 x MONITOR |
|
| Control Connectors | Description |
| 1 x ETHERNET | Connect to the PC for communication or connect to the Web for device control. |
| 1 x USB (Type-B) |
|
| 1 x USB (Type-A) | Used as the output connector to connect a NovaPro UHD Jr unit for image mosaic. |
| 1 x GENLOCK IN LOOP | Connect to a synchronization signal to synchronize all the connected NovaPro UHD Jr units. |
| 1 x RS232 | Connect to the central control device. |

2. NovaStar Novapro UHD Jr Dimensions & Physical Specifications
Electrical Specifications | Power connector | 100-240V~, 50/60Hz, 2A max |
Power consumption | 70 W | |
Working Environment | Temperature | 0°C to +45°C |
Humidity | 0% RH to 80% RH, non-condensing | |
Storage Environment | Temperature | –10°C to +60°C |
Humidity | 0% RH to 95% RH, non-condensing | |
Physical Specifications | Dimensions | 482.6 mm ×395.5 mm ×139.0 mm |
Net weight | 6.3 kg | |
Gross weight | 13 kg | |
Packing Information | Packing box | 604mm ×524mm ×291mm |
Carrying case | 595mm ×275mm ×500mm | |
Accessories | 1x Power cable (EU) 1x Power cable (US) 1x Power cable (UK) 1x Cat5e cable 1x USB cable 1x DVI cable 1x HDMI cable 1x DP cable 1x Quick Start Guide 1x Packing List 1x Customer Letter 4x Silicone dust plugs | |
Noise Level ( typical at 25°C /77°F) | 46 dB(A) | |
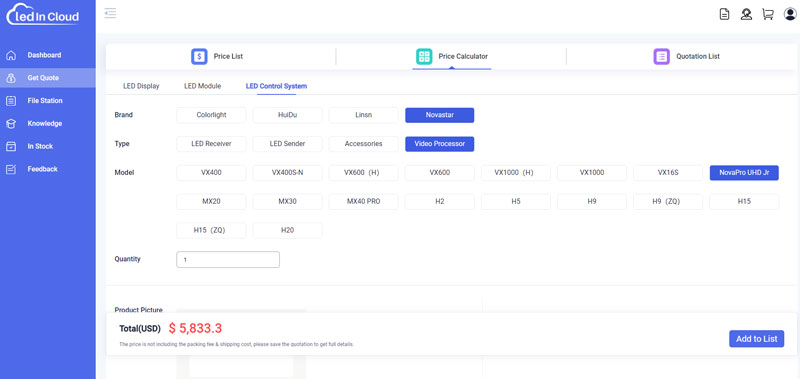
3. Novapro UHD Jr Price
To ensure you get the most accurate and up-to-date pricing for the Novastar Pro UHD Jr and other Novastar products, we recommend using our LED Screen Cloud Platform.
4. NovaStar Novapro UHD Jr Software & Resource Download
When you use Novapro UHD Jr LED controller, the following software you will need. LedInCloud also provides the latest NovaStar Software, just clck to download:
Novapro UHD Jr Resource Download:
NovaPro UHD Jr Manual
NovaPro UHD Jr Web Manual
NovaPro UHD Jr Specifications
NovaPro UHD Jr Quick Start Guide
NovaPro UHD Jr Firmware
More Novapro UHD Jr Software Download, you can visit our Novastar software downloads.
5. NovaStar Novapro UHD Jr Manual
5.1 Screen Brightness
Step 1: Enter the device menu.
Step 2: Navigate to ‘Screen Brightness’ and confirm your selection by pressing the knob.
Step 3: Adjust the brightness by rotating the knob. The LED screen will show changes as you make them. Press the knob to set the brightness once you’re content with the level.
5.2 Layer Settings
Step 1: Enter the device menu by pressing the knob.
Step 2: Select ‘Layer Settings’ by rotating the knob and press to access the settings. Here, you can configure:
- Main layer
- PIP1 and PIP 2
- BKG
- OSD
5.3 Setting Input Source Resolution
Input resolutions vary by connector. Refer to the accompanying picture to select a standard resolution or to customize one.
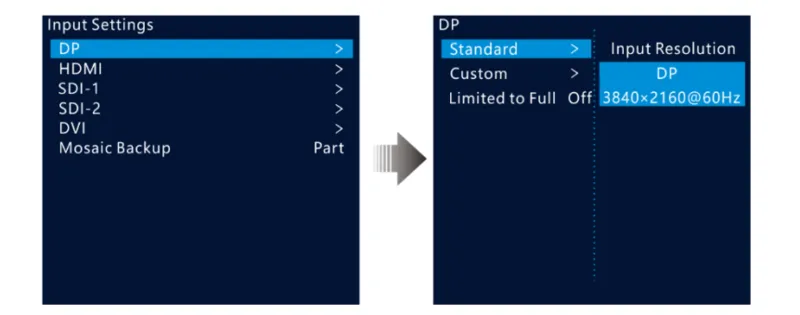
5.4 Standard Resolution of NovaStar Novapro UHD Jr
_15.webp)
_1.webp)
5.5 Preset Settings
The NovaPro UHD Jr allows you to store up to 10 custom presets.
Step 1: Turn the knob to highlight ‘Preset Settings’ and press it to access the submenu.
Step 2: Twist the knob to pick a preset and press again to see options: Save, Load, Clear, or Copy To.
- Save: Store your current settings and layout to the chosen preset.
- Load: Apply the settings from the selected preset to your current layout.
- Clear: Clear all settings within the chosen preset.
- Copy To: Duplicate your current settings to another preset slot.
5.6 Display Control
Manage how your display behaves with these settings.
Step 1: Press the knob to open the device menu.
Step 2: Rotate the knob to ‘Display Control’ and press to set the following:
- Normal: Display the content of the current input source normally.
- Freeze: Hold the current image still on the screen.
- Black Out: Turn the display off (the screen goes black).
- Test Pattern: Test the display effect and working status of the LED screen. Test patterns include Pure Color, Gradient, Grid, Brightness, Spacing, and Speed.
- Image Color: Adjust the color of the output image and the LED screen will display the effect in real
time.
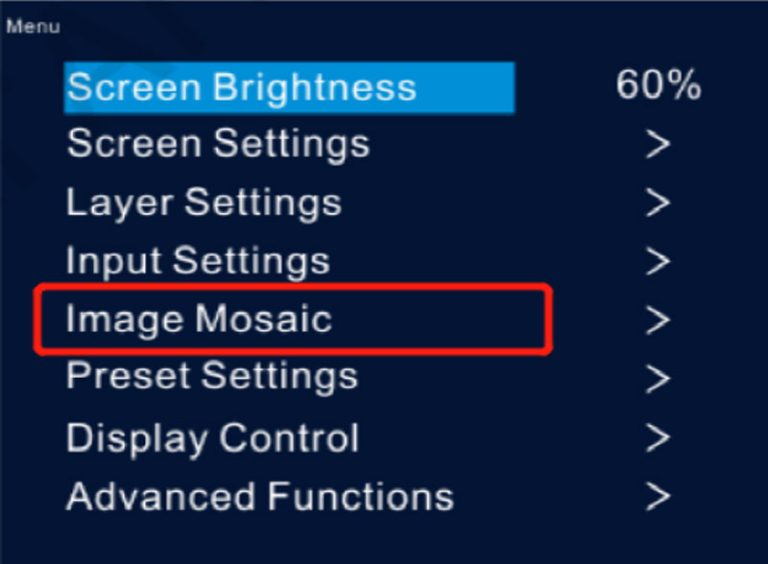
5.7 Image Mosaic Settings
a. Press and rotate the front panel knob to go to Image Mosaic settings of UHD JR, as show in below pic.
b. Press the knob again to enter image mosaic settings. Enable Image Mosaic (Keep status on)
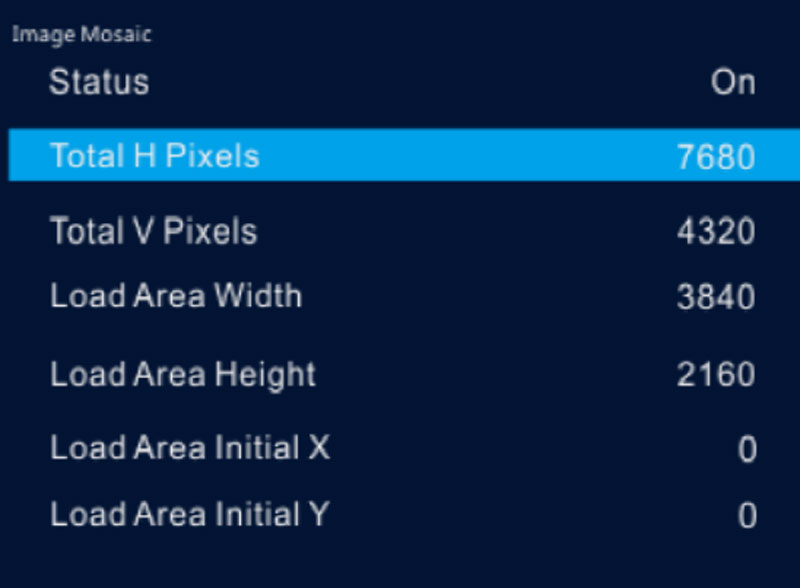
c. Detailed parameter settings for two UHD JR.
UHD JR 1 (Left):
Total H Pixels 6400
Total V Pixels 1800
Local Area Width 3200
Local Area Height 1800
Load Area Initial X 0
Load Area Initial Y 0
UHD JR 2 (Right):
Total H Pixels 6400
Total V Pixels 1800
Local Area Width 3200
Local Area Height 1800
Load Area Initial X 3200
Load Area Initial Y 0