NovaStar Calibration: NovaCLB, CalCube & Caliris Camera System Guide
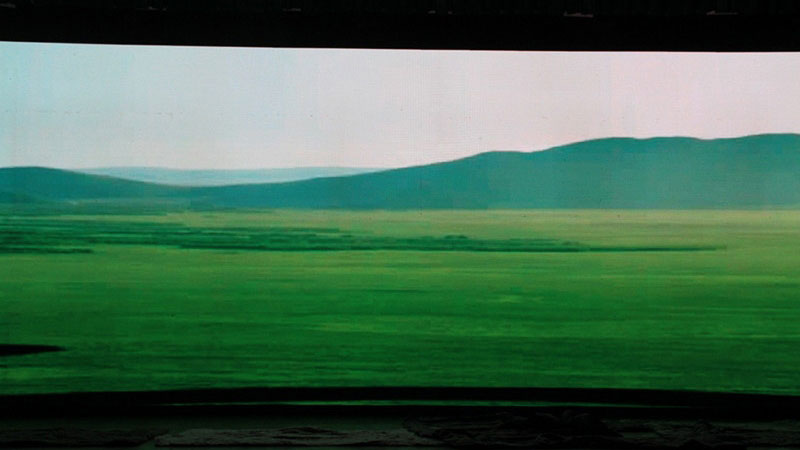
NovaStar calibration keeps LED displays looking uniform over time. Without it, brightness drifts, colors shift, and visible seams appear between cabinets. The system measures the actual output of every pixel and applies correction data to bring the display back to a consistent standard.
This guide covers the full lineup: NovaCLB, CalCube MiniLED, and the Caliris camera system — including how each one works, when to use it, and a step-by-step walkthrough of the field calibration process.
Table of Content:
1. NovaStar Calibration Introduction
2. Common Display Problems That Calibration Can Fix
3. NovaStar Calibration Systems
3.1 NovaCLB
3.2 Caliris Camera System
3.3 CalCube MiniLED
3.4 NovaCLB vs CalCube: How to Choose
3.5 NovaStar Calibration Software Download
4. How to Calibrate with NovaCLB-Screen
5. NovaStar LED Calibration Solutions
6. NovaStar Color Calibration Cases
7. FAQs
8. Conclusion
9. Glossary of Terms
1. NovaStar Calibration Introduction
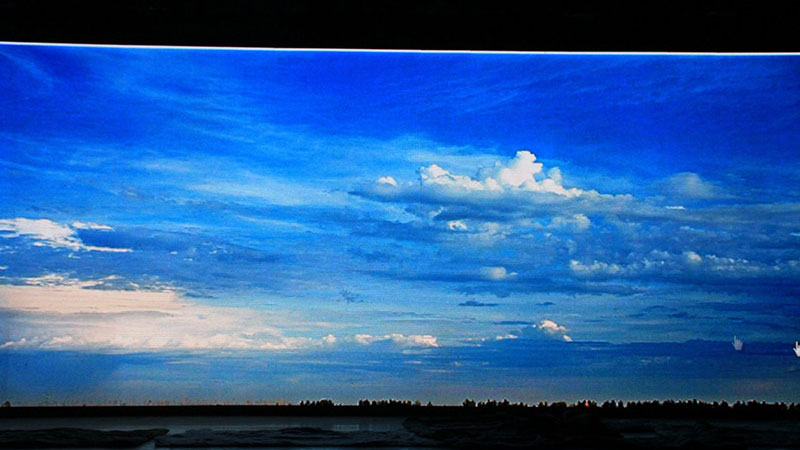
LED displays don’t stay perfectly uniform over time. Brightness drifts, colors shift, and visible seams appear between cabinets. NovaStar LED calibration fixes that — by measuring the actual output of every pixel and applying correction data to bring the display back to a consistent standard.
1.1 Why LED Displays Lose Uniformity
Even LEDs from the same production batch don’t produce identical brightness or color. Driver ICs deliver slightly different current levels. After months of operation, LEDs decay at different rates depending on heat, humidity, and usage. On top of that, cabinet assembly tolerances and viewing angle differences add more variation.
None of these issues are signs of a defective product. It’s just how LED physics works. But over time, the effects stack up — patchy brightness, color drift, and hard lines between panels all trace back to the same root cause.

1.2 What LED Display Calibration Does
Calibration doesn’t change the hardware. It measures what each pixel is actually producing, then tells the control system how to compensate.
NovaStar’s approach works at the pixel level. A camera or colorimeter captures brightness and color data from the display. The software then calculates a correction coefficient for every pixel and writes those values into the receiving cards, where they adjust how each LED is driven in real time.
Four functions are involved. Brightness calibration removes bright and dark spots by evening out luminance levels. Color calibration reduces chromaticity differences between LEDs, especially when mixing cabinets from different batches. Gamma calibration smooths out the grayscale curve so transitions look natural. Edge calibration addresses brightness imbalances at panel boundaries.
All four run within the same workflow, through software that connects directly to the NovaStar control system.
2. Common Display Problems That Calibration Can Fix
Before getting into the systems themselves, it helps to know what you’re actually solving. Most visual issues on LED displays fall into a handful of recognizable patterns — and all of them respond to pixel-level calibration.
2.1 Screen Distortion
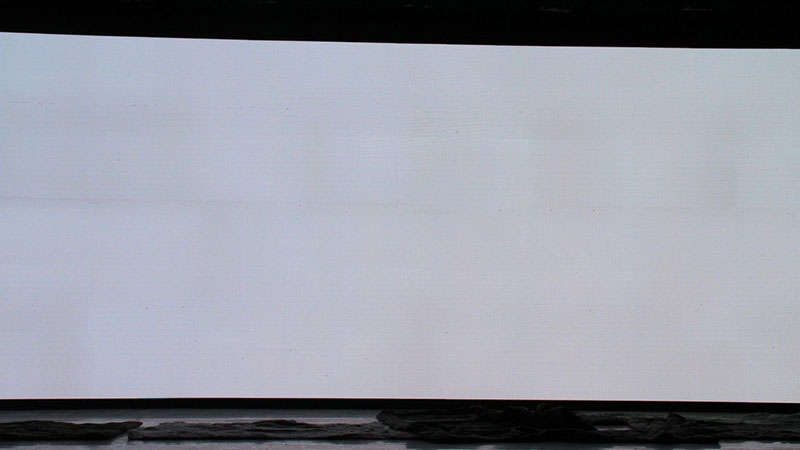
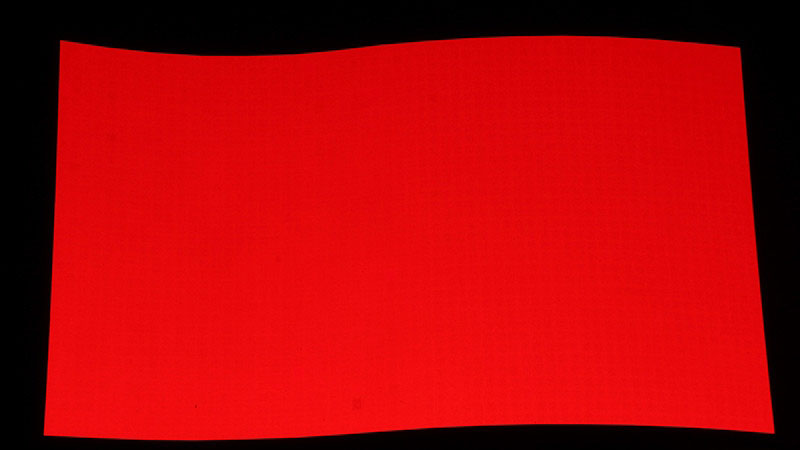
Uneven brightness or color across panels makes the image look patchy or washed out in certain areas. This usually comes from driver IC tolerances or LED aging at different rates across the screen. Calibration measures each pixel’s actual output and applies compensating values, restoring a smooth and balanced image.

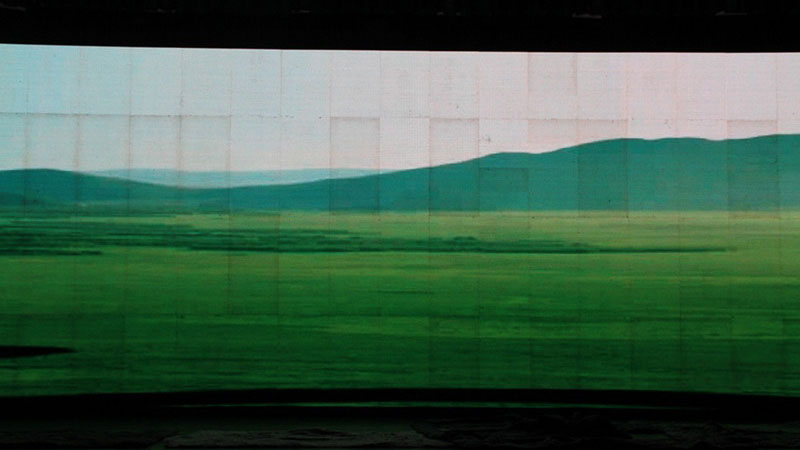
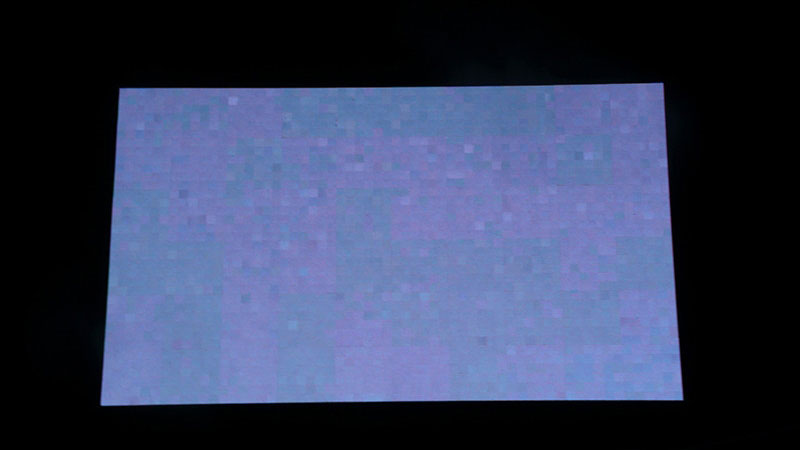
2.2 Mosaic Phenomenon
When LED modules show a grid-like, checkerboard appearance, it typically means the display is mixing chips with different wavelength or brightness values — even within the same cabinet. LED color calibration targets these per-pixel variations and brings the output back into alignment.

2.3 Multi-Batch Mixing
Rental companies and system integrators frequently combine cabinets from different production batches. The visual difference between batches can be obvious, especially under white or gray content. NovaStar color calibration unifies the color temperature and brightness across all modules, so the assembled screen looks like a single consistent display.

2.4 Splicing Lines
Visible bright or dark lines at cabinet edges are one of the most common complaints after installation. They’re caused by brightness imbalance at the seam between panels — sometimes from mechanical tolerance, sometimes from the LEDs near the edge behaving differently than those in the center. Calibration evens out the luminance across boundaries, making the seam disappear.

One thing worth noting: calibration doesn’t fix dead pixels, physical damage, or hardware faults. What it does fix is anything related to uneven brightness and color — which covers the majority of visual complaints on real-world installations.
3. NovaStar Calibration Systems
NovaStar offers three calibration systems: NovaCLB, CalCube MiniLED, and the Caliris camera. Each one targets a different scenario. NovaCLB is the foundation and covers the widest range of display types. CalCube MiniLED is built specifically for fine-pitch and MiniLED screens. Caliris is the dedicated industrial camera that pairs with both.
This section covers how each system works, what it’s designed for, and how to choose between them.
3.1 NovaCLB
NovaCLB is NovaStar’s pixel-level calibration system. It measures every pixel’s actual brightness and color output, then writes correction values directly into the display’s receiving cards.
The system has two modes: NovaCLB-Cabinet for factory use, and NovaCLB-Screen for on-site use. They handle different stages of a display’s life — and work best when used together.
3.1.1 How it works
A camera points at the display and captures brightness and color data. The software calculates a unique correction coefficient for every pixel, then uploads those values into the receiving cards via NovaLCT.
Two camera options are supported: a Canon DSLR for standard jobs, or the Caliris C1200 for higher precision. More on that in section 3.2.
3.1.2 NovaCLB-Cabinet — Factory Calibration
This is done on the production line, one cabinet at a time, before shipping.
Each cabinet is measured, corrected, and written into flash memory. When cabinets later get assembled on a rental stage or permanent install, they match each other without seam lines or color differences.
- Speed: ~1 minute per cabinet
- Brightness accuracy: within ±2.5% variance
- Best for: rental companies, large-scale productions, factories
3.1.3 NovaCLB-Screen — Field Calibration
This is done on-site, after the display is fully installed.
Instead of calibrating one cabinet at a time, NovaCLB-Screen treats the whole screen as a single unit — measuring it from the viewer’s position, under real conditions. It corrects for aging, installation tolerances, and anything else that factory calibration couldn’t predict.
- Speed: 600,000 pixels in ~25 minutes, one engineer
- Brightness accuracy: <1% variance
- Chromaticity accuracy: <0.003
- Also supports: curved screens, irregular shapes, single-module replacement
- Note: must be done at night or in a dark environment
3.1.4 Cabinet vs Screen — Side by Side
| Items | NovaCLB-Cabinet | NovaCLB-Screen |
| Used at | Production line | Installation site |
| Calibrates | One cabinet | Full screen |
| Speed | ~1 min / cabinet | 600K px / 25 min |
| Brightness | ±2.5% | <1% |
| Chromaticity | ±0.005% | <0.003 |
| Curved screens | ✗ | ✓ |
| Module replacement | ✗ | ✓ |
| Environment | Factory | Dark / night |
3.2 Caliris Camera System
The Caliris C1200 is industrial NovaStar calibration camera, designed specifically for use with NovaCLB-Screen.
It’s not a general-purpose camera. Every part of it — the sensor, the lens, the firmware — is built around one job: capturing accurate brightness and color data from LED displays during field calibration.
3.2.1 How it connects
Plug it into power, then connect it to the calibration computer via USB. Wait for the indicator light to turn green. Once the software detects it, you’re ready to go.
Unlike a Canon DSLR, the Caliris doesn’t have a built-in viewfinder or LCD screen. To check framing, use the Image Preview function inside NovaCLB-Screen.
3.2.2 Caliris vs Canon DSLR
Both cameras work with NovaCLB-Screen. The difference comes down to coverage area and precision.
| Features | Caliris C1200 | Canon DSLR |
| Max capture area per shot | 480 × 330 pixels | 224 × 150 pixels |
| Real-Time Analysis | ✓ | ✗ |
| Built-in preview | ✗ (use software) | ✓ (LCD / viewfinder) |
| Setup complexity | Slightly higher | Simpler |
| Best for | High-precision jobs | Standard calibration |
The coverage difference is significant. Caliris captures roughly 4.5× more pixels per shot than a Canon DSLR. That means fewer partitions per calibration session, which speeds up the whole process on large screens.
The Real-Time Analysis feature is exclusive to Caliris. It automatically adjusts saturation and exposure parameters in live preview — the software analyzes the image and tells you when the settings are good. With a Canon, you adjust those parameters manually.
3.2.3 When to use Caliris
Use the Caliris C1200 when you need higher precision — fine-pitch indoor screens, broadcast studios, or any installation where color accuracy is critical.
A Canon DSLR is perfectly capable for standard LED display calibration jobs. If you’re calibrating a typical outdoor advertising screen or a rental stage wall, it gets the job done.
For the highest-quality results on demanding installations, Caliris is the better choice.
3.3 CalCube MiniLED
CalCube MiniLED is NovaStar’s calibration system built specifically for MiniLED and fine-pitch SMD displays.
NovaCLB handles most display types well. But MiniLED screens have their own set of problems — tighter pixel pitch, cross-light interference between adjacent points, and low-grayscale uniformity issues that standard calibration doesn’t fully address. CalCube was built to solve those specific problems.
3.3.1 What makes MiniLED calibration different
On a standard LED display, individual pixels are spaced far enough apart that each one can be measured independently without interference from its neighbors.
MiniLED changes that. The points are so close together that light from one pixel bleeds into the measurement area of the next. If the calibration system doesn’t account for that, the correction data comes out wrong — and the screen still looks uneven after calibration.
CalCube’s cross-light elimination algorithm specifically handles this. It separates each pixel’s actual output from the bleed-over of adjacent points, so the measurement data is clean.
3.3.2 Key features
Full-grayscale calibration: Corrects uniformity across every brightness level, not just at peak brightness. This matters for indoor fine-pitch screens, where content often sits in the mid and low grayscale range.
Low-gray calibration: Targets the mottling and uneven transitions that appear in darker image areas. Especially useful for screens with special drive ICs that struggle with low-end grayscale accuracy.
Super-resolution imaging: Reduces image acquisition time per zone, which speeds up the overall calibration session without sacrificing accuracy.
Curved surface correction: Handles brightness and color differences that appear across curved calibration zones, keeping the entire screen smooth and consistent.
Performance after calibration: brightness variance below 1%, chromaticity difference under 0.003 — same targets as NovaCLB-Screen.
3.3.3 Three calibration modes
CalCube supports three modes depending on what the display needs:
- Brightness + chromaticity calibration — standard correction for color and luminance
- Full-grayscale calibration — correction across all brightness levels
- Low-grayscale calibration — targeted fix for shadow and dark-area uniformity
Most fine-pitch installations benefit from running full-grayscale or low-grayscale calibration, not just the standard mode.
3.4 NovaCLB vs CalCube: How to Choose
The short answer: display type decides it.
NovaCLB is the general-purpose system. CalCube is built specifically for MiniLED and fine-pitch SMD screens. If you’re not sure which one applies to your project, the table below should make it clear.
| Features | NovaCLB | CalCube MiniLED |
| Display type | Outdoor, rental, standard indoor | MiniLED, fine-pitch SMD indoor |
| Pixel pitch | P2 and above | Sub-P2, fine-pitch |
| Full-grayscale calibration | ✗ | ✓ |
| Low-gray calibration | ✗ | ✓ |
| Cross-light elimination | ✗ | ✓ |
| Curved / irregular screens | ✓ | ✓ |
| Post-calibration brightness | <1% variance | <1% variance |
| Post-calibration chromaticity | <0.003 | <0.003 |
Both systems hit the same accuracy targets after calibration. The difference is in what problems each one is equipped to solve.
✔ Choose NovaCLB if:
- You’re working with outdoor advertising displays, rental stages, or standard indoor screens
- Your display uses P2 pitch or larger
- You need field calibration for curved or irregularly shaped screens
✔ Choose CalCube MiniLED if:
- You’re working with MiniLED or fine-pitch SMD displays
- Low-grayscale uniformity is a priority — broadcast studios, high-end conference rooms, control centers
- Your display uses special drive ICs that struggle with low-end grayscale accuracy
Not sure? The pixel pitch is usually the deciding factor. Fine-pitch indoor screens almost always benefit from CalCube. Everything else, NovaCLB covers it.
3.5 Software Download
All NovaStar calibration software below is free to download. Each version includes a user manual and quick start guide.
✔ NovaCLB-Screen
✔ NovaCLB-Cabinet
✔ CalCube MiniLED
Not sure which version to use? Download the latest one. If you’re working with older NovaStar hardware, check the user manual first for compatibility notes.
4. How to Calibrate with NovaCLB-Screen
This section covers the full-screen field calibration process using NovaCLB-Screen.
Before you start
Two things need to be in place before you open the software.
First, the environment. Field calibration must be done at night or in a fully dark environment. Ambient light interferes with camera measurements and produces inaccurate correction data. Outdoor jobs are always scheduled after dark for this reason.
Second, the screen. Power it on and let it run for at least 30 minutes before calibration begins. LEDs need time to reach their normal operating temperature — measuring a cold screen gives you numbers that won’t hold up once the display warms up.

Step 1 — Connect to the control system
Open NovaCLB-Screen. On the Initialization page, enter the IP address and port number of the computer running NovaLCT. The default port is 8080.
Click Connect. Once the connection is live, the software automatically reads your screen resolution and cabinet count. From here, either create a new calibration database or load an existing one. This database file stores all correction coefficients and calibration history — keep it somewhere safe.

Step 2 — Choose and connect your camera
Select your camera type: Digital camera (Canon DSLR) or Caliris.
For a Canon DSLR, connect via USB and set the mode dial to M (manual) and lens focus to MF (manual focus). For the Caliris C1200, connect both the power supply and USB cable, then wait for the indicator light to turn green.
Once connected, the software shows the camera status as Connected. Don’t proceed until you see this confirmation.


Step 3 — Set up partitions
Because the camera can only cover a limited area per shot, NovaCLB-Screen divides the full display into smaller zones called partitions. Each zone gets measured and calibrated separately.
Click Recommend to let the software calculate the partition size automatically. If you need a custom setup, click Customize instead. The maximum capture area per partition is 224×150 pixels for a Canon DSLR and 480×330 pixels for the Caliris C1200.
If the screen has a physical border covering the edge LEDs, set the border row and column count so the software handles those edges correctly.
Step 4 — Adjust camera parameters
Point the camera at the first partition and adjust the settings until you hit two targets:
- Saturation: Normal (value between 60–100)
- Area: Fit (value between 50–150)
Click Auto All and the software adjusts parameters automatically. If the result isn’t Normal, adjust manually in this order: aperture first, then exposure time, then brightness. Do not move to the next step until saturation reads Normal — this is the most common mistake that leads to poor calibration results.

Step 5 — Run calibration
Check Automatic Mode and click Start.
The software runs through the full sequence on its own: warm up → analyze Red LEDs → analyze Green LEDs → analyze Blue LEDs → generate coefficients → upload to receiving cards → save to hardware → save to database.
Once a partition is done, move the camera to the next one and repeat. You can adjust the camera angle between partitions, but do not change the distance between the camera and the screen. Keeping that distance consistent is critical for uniform results across all zones.

Step 6 — Eliminate partition boundaries
After all partitions are calibrated, subtle brightness differences can sometimes appear along the edges where zones meet. This is normal and easy to fix.
Click Eliminate Boundaries, then follow the sequence: Coefficients Simulation → Upload Coefs → Save to Hardware → Save to Database.
The Coefficients Simulation view lets you check the result before uploading. If it looks good, apply.

Step 7 — Save and verify
Once the boundary elimination is done, your calibration data is already saved to both the hardware and the database. The screen should now show consistent brightness and color across all cabinets.
To verify the result, use the Evaluate Uniformity function inside NovaCLB-Screen. It captures before and after measurements and shows you exactly how much the uniformity improved. The closer the uniformity value is to 0, the better.

5. NovaStar LED Calibration Solutions
The combination of the Nova M3 control system and the NovaCLB calibration system creates a comprehensive approach for achieving exceptional calibration and display performance. This integrated system allows for seamless transmission of calibration coefficients and a closed-loop application, resulting in outstanding visual consistency. Whether it’s cabinet calibration or on-site adjustments, for indoor or outdoor settings, or even complex and irregularly shaped screens, NovaStar’s solutions provide the precision needed for any scenario.
5.1 Production Line Calibration
Production line calibration is the process of adjusting each cabinet before it leaves the factory. This approach makes sure that when cabinets are assembled on-site, the display looks consistent. NovaStar offers three solutions:
5.1.1 Standard Cabinet Calibration
A simple, efficient solution with an automated process for consistent results.

5.1.2 Rental Application Calibration
Adds a photometer to match cabinets from different batches, perfect for rental setups.

5.1.3 Supplementary Order Calibration
Uses precise human eye adjustment to match new cabinets with existing ones for top-quality results.

5.2 Field Calibration
Field calibration is used to maintain display quality in different environments. NovaStar provides solutions for:
5.2.1 Curved LED Screens
Keeps color and brightness consistent across curved displays.


5.2.2 Irregular LED Screens
Adapts to the unique shapes of custom screens for smooth visuals.

5.2.3 Ultra-Large LED Screens
Provides even calibration across large displays, handling the challenges of scale.

6. NovaStar Color Calibration Cases
NovaStar’s calibration systems have been applied in various industries and project types, covering indoor fine-pitch screens, outdoor advertising, and rental applications.
The following examples illustrate how different calibration methods are used to improve display uniformity and color consistency in real environments.
6.1 Cabinet Calibration - A Rental Company in Beijing
A rental company in Beijing uses NovaCLB during production to calibrate each cabinet before delivery.
This process balances brightness and color within individual modules, allowing them to be combined freely in different configurations for stage events and exhibitions.


6.2 Curved Screen Calibration - A Plaza in Wuhan, Hubei
A large outdoor curved LED screen in Wuhan required calibration after installation to correct brightness variation along its arc surface.
The corrected display presented consistent brightness and color across the curve, improving readability and visual smoothness for public content.
6.3 Flat Screen Calibration - A Real Estate Group Headquarters
Technicians applied pixel-level full-screen calibration to realign the display’s color temperature and brightness balance.
The calibration restored a uniform tone and improved grayscale performance, making the display suitable for presentations and long-term operation in an office environment.
7. FAQs
NovaCLB-Cabinet vs NovaCLB-Screen — which one do I need?
Depends on where you are in the process. Cabinet is for the production line — one cabinet at a time before shipping. Screen is for on-site calibration after the display is installed. For the best results, use both.
What cameras does NovaCLB support?
Two options: a Canon DSLR or the Caliris C1200. Canon handles standard jobs. Caliris covers more pixels per shot (480×330 vs 224×150) and includes automatic parameter adjustment — better for large or fine-pitch screens.
What's the difference between NovaCLB and CalCube MiniLED?
NovaCLB works with most display types. CalCube is built specifically for MiniLED and fine-pitch SMD screens — it adds full-grayscale calibration, low-gray calibration, and cross-light elimination. If your display is below P2, use CalCube.
Caliris vs Canon DSLR — which is better?
Both work. Canon is simpler and covers standard jobs. Caliris captures a larger area per shot and adjusts parameters automatically. For fine-pitch screens, broadcast studios, or high-precision work, Caliris is the better choice.
What happens to calibration data when I replace a module or receiving card?
Replacing a receiving card loses the coefficients stored on it — re-upload from your calibration database. Replacing a module on a screen calibrated with NovaCLB-Screen? Use the New Module function to recalibrate just that section without redoing the full screen.
Why does turning off calibration sometimes make brightness look more even?
It means some receiving cards have calibration data and others don't. The fix isn't turning calibration off — it's making sure all cards have coefficients loaded from the same calibration session.
How long does calibration last?
No fixed expiry. Indoor screens typically hold well for 1–2 years. Outdoor displays or high-brightness screens may need recalibration sooner. Recalibrate when visible inconsistencies reappear.
Can calibration fix dead pixels?
No. Dead pixels are a hardware problem — replace the module. After replacement, use the New Module function in NovaCLB-Screen to recalibrate that section.
Can I do NovaStar calibration myself?
Yes, with the right equipment: a calibration computer, NovaCLB or CalCube software, a compatible camera, and access to NovaLCT. Field calibration must be done at night or in a dark environment. The user manual and quick start guide cover the full process. Contact our team if you need help getting started.
8. Conclusion
NovaStar calibration systems — NovaCLB, CalCube MiniLED, and the Caliris camera — cover the full range of LED display calibration needs, from factory production lines to complex on-site installations.
The right choice depends on your display type and where you are in the process. NovaCLB handles most scenarios. CalCube steps in for MiniLED and fine-pitch screens. And doing both factory and field calibration, rather than just one, consistently delivers the best results.
If you’re looking for NovaStar calibration systems, need help choosing between NovaCLB and CalCube, or want a quote for an LED display that comes factory-calibrated, get in touch with LedInCloud – LED Screen Cloud Platform. We’ll point you in the right direction based on your specific project.
9. Glossary of Terms
| Term | Explanation |
| Brightness Calibration | Adjusts each LED’s brightness output to make the whole screen look evenly lit. Does not affect color. |
| Brightness Uniformity | Describes how evenly brightness appears across the display. Good uniformity means no obvious bright or dark areas. |
| CalCube MiniLED | NovaStar’s calibration system built for MiniLED and fine-pitch screens. Handles low-gray unevenness and cross-light interference that standard calibration can’t fully address. |
| Calibration Coefficients | The correction values the software calculates for every pixel. These values tell each LED how much to adjust its brightness and color output. |
| Caliris C1200 | NovaStar’s industrial calibration camera, used with NovaCLB-Screen. Captures a larger area per shot than a Canon DSLR and adjusts parameters automatically. |
| Chromaticity / Chromaticity Coordinates | A set of numbers (x, y) that describe a color’s tone and saturation. Used to measure and match color accuracy between different LEDs. |
| Chromaticity Calibration | Adjusts the color output of each LED to reduce color differences across the display — especially useful when mixing cabinets from different production batches. |
| Full-Grayscale Calibration | Adjusts all brightness levels — from dark to bright — so the screen reproduces tones more accurately across the full range. |
| Gamma Curve | A setting that defines how the screen displays brightness from dark to light. Adjusting the gamma makes grayscale transitions smoother and more natural. |
| Low-Gray Calibration | Fixes uneven color or brightness in darker image areas, making shadows and gradients look smoother. |
| NovaCLB | NovaStar’s complete pixel-level calibration system. Available in two modes: NovaCLB-Cabinet for factory use and NovaCLB-Screen for on-site field calibration. |
| NovaCLB-Cabinet | The factory mode of NovaCLB. Calibrates one cabinet at a time on the production line, at around 1 minute per cabinet. |
| NovaCLB-Screen | The field mode of NovaCLB. Calibrates a fully installed display on-site, covering around 600,000 pixels in 25 minutes with one engineer. |
| NovaLCT | NovaStar’s LED display configuration software. NovaCLB and CalCube connect through it to read screen settings and upload calibration coefficients. |
| Pixel-Level Calibration | A method that adjusts the brightness and color of each LED pixel individually. Helps the entire screen look even and natural instead of patchy or uneven. |
| PWM (Pulse Width Modulation) | A way of controlling LED brightness by rapidly switching the LED on and off. The longer the “on” time, the brighter the LED appears. |
| Receiving Card | A small control board inside each LED cabinet. It receives image data from the sending card and controls the LEDs to display the picture. Calibration coefficients are stored directly on it. |
| Seam Brightness Calibration | A mode in NovaCLB-Screen that specifically corrects bright or dark lines appearing at the boundary between LED cabinets or panels. |
| Splicing Line | A visible line or color difference between LED cabinets caused by uneven brightness. Calibration helps remove or reduce these lines. |